
Stone Types: How to Identify Common Stones by Sight
Learn how to recognize common stone types using visible traits, simple checks, and next steps. Practical photo-first guidance for hobbyists and collectors.
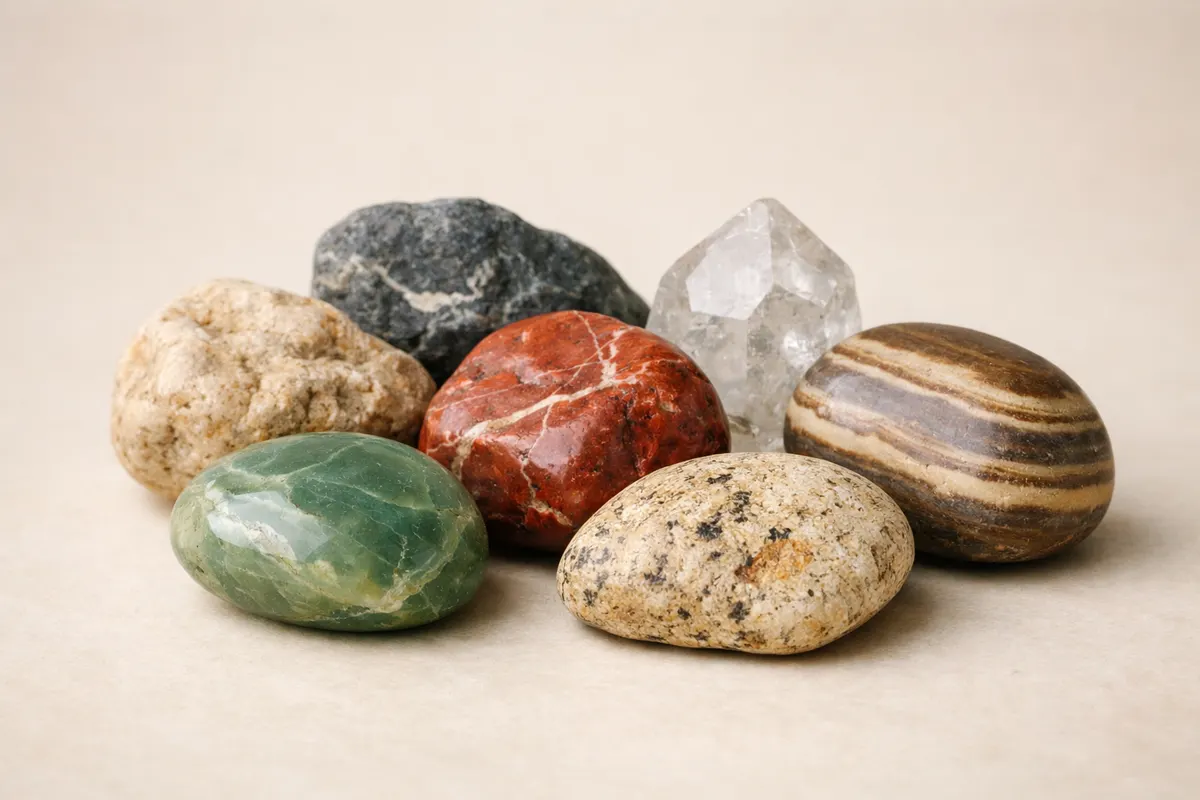
Quick answer: recognizing stone types at a glance
Stone types can often be narrowed down from a phone photo or a close look by checking a few visible traits: color and color zoning, transparency, surface luster, prominent inclusions or patterns, and how the stone reacts to light. For example, a clear, faceted green stone with strong, even color is more likely to be a garnet or tourmaline than an opaque jasper, while a milky, banded piece points toward agate or onyx family stones.
That said, photos and quick visual checks typically produce a shortlist rather than a definitive ID. Visual evidence can separate broad groups—gemstones (transparent to translucent), opaque decorative stones, and rough minerals—but cannot prove treatments, synthetic origin, or exact species without more testing. Treat an on-camera match as a working hypothesis that guides what you should check next.
For a first-pass workflow, document the stone's color, transparency, visible patterns, luster, and surrounding context with clear photographs. A suitable weight measurement may add context if it can be obtained safely, but apparent heft is not a composition measurement. Keep the specimen intact while comparing documented examples. Scratching, streaking, cutting, heating, or applying chemicals can alter a stone and should not be presented as harmless ways to complete a photo identification.
A practical stone identification guide for first checks
A stone identification guide gives you a structured way to turn what you see into a small set of likely matches. It doesn't try to replace lab grading or gemological instruments; instead, it organizes visible traits and easy context checks so you can decide whether a stone is a common ornamental rock, a gemstone, or a polished imitation.
For example, the guide helps you translate visual clues into what they mean: translucency plus glassy luster points toward quartz-family gems (like amethyst or citrine), whereas an oily or greasy sheen on a dark piece is often a sign of certain jaspers or some types of obsidian. The guide also flags lookalikes that routinely confuse hobbyists—e.g., dyed chalcedony versus natural blue chalcedony.
Using a guide saves time. If your photo shows banded, semi-translucent layers with concentric rings, you can reasonably prioritize agate and related chalcedonies over single-crystal gems. Conversely, if the stone is faceted, color is uniform, and there’s strong brilliance, you prioritize transparent gemstones and consider cut, clarity, and potential treatments as the next checks.
Stone visual clues to check first
Stone visual clues are the fastest way to reject unlikely matches and pick a focused candidate group. Start with five things you can see in a single photo or by holding the stone: color and zoning, transparency, surface luster, patterning or banding, and obvious inclusions or cavities. Each of these clues shifts the probability between major stone families.
Color: note whether color is even, zoned (stripes, spots), or surface-only (dye sits on the surface). Zoning can indicate natural crystal growth (e.g., tourmaline) or heat-treated gemstones; surface-only color often points to dyed or treated pieces.
Transparency and luster: rank the specimen as transparent, translucent, or opaque. Transparent stones with a vitreous (glassy) luster are often gems like topaz, quartz, or beryl; waxy or dull luster suggests nephrite, jadeite, or many jaspers. Metallic or submetallic luster can indicate sulfide minerals or heavily included specimens.
Patterning: banding, chatoyancy (cat’s-eye effect), and iridescence are high-value clues. Banded agates and dendritic patterns point strongly to chalcedony-family stones. Chatoyancy often indicates fibrous structures in chrysoberyl or certain silicates and is especially diagnostic when combined with color and translucency.
- Color zoning vs uniform color: zoned green can be tourmaline; even green may be aventurine or dyed quartz.
- Surface luster types: vitreous = many gems; waxy = some jades and jaspers; resinous = amber or copal.
- Inclusions you can spot: visible crystals or needles often mean natural gem material; bubbles usually indicate glass or resin.
- Banding and pattern shape: concentric rings often signal agate; branching (dendritic) patterns suggest manganese oxide inclusions.
Step-by-step workflow to narrow down stone types
Turn the clues into a repeatable workflow you can follow for every unknown stone. Step 1: document the specimen with at least two photos—one in diffuse daylight and one with a flash or bright lamp angled to reveal luster and surface texture. A macro close-up of any inclusion or pattern is especially useful.
Step 2: classify by transparency and luster. Place the stone into one of three buckets: transparent (possible faceted gems), translucent (many chalcedonies, some beryls), or opaque (jaspers, some minerals). Mark the luster as glassy, waxy, metallic, or dull; that alone eliminates large families of possibilities.
Step 3: preserve the specimen while deciding what needs further examination. A scratch or hardness test deliberately marks a surface, and rubbing a specimen on a streak plate can remove material. These are not automatically non-destructive tests, even on an inconspicuous edge. Avoid them on unknown, finished, fragile, mounted, or potentially valuable objects. A qualified geologist, gemologist, or conservator can advise whether a particular test is appropriate and how its result should be interpreted.
Step 4: compare the stone to trusted reference photos and shortlists. Use curated visual guides such as the site's Gemstone Identification page (https://stoneidentification.app/identify/gemstone-identification) and focused articles like Black Stone Identification (https://stoneidentification.app/blog/black-stone-identification) for pattern and luster matches. If several clues align, you have a working ID; if not, consider professional lab testing.
- Photograph in two lighting conditions: diffuse daylight and directional light to reveal luster.
- Bucket by transparency then assign likely families (transparent → gemstones; opaque → decorative rocks).
- Preserve the specimen: document visible features and avoid scratch, streak, heat, or chemical tests unless a qualified professional recommends them for that object.
- Use curated references and example cases to compare; keep a shortlist of 2–3 candidates before deeper tests.
Examples: matching photos to likely stone types
Example 1 — Transparent green stone in a ring: several materials and imitations can appear similar in a photograph. Record the cut, visible inclusions, luster, and setting without treating uniform color or sparkle as proof of a mineral. A photograph cannot establish hardness, and deliberately scratching a mounted stone can damage it. Keep a shortlist and obtain appropriate professional examination when composition, treatment, or value matters.
Example 2 — Opaque black cabochon: A smooth, waxy black cabochon could be obsidian, onyx (banded chalcedony dyed black), or black jasper. Look for conchoidal fracture (obsidian tends to show it), subtle banding or layering (onyx/chalcedony), or a granular surface texture (jasper). The site's focused post on black stones (https://stoneidentification.app/blog/black-stone-identification) has side-by-side photo clues that help in this scenario.
Example 3 — Light blue crystalline cluster: A pale blue crystal cluster with visible individual crystals and glassy faces often indicates minerals like celestine or aquamarine (beryl) depending on crystal habit and hardness. For small hobbyist specimens, see the Light Blue Crystal Identification article (https://stoneidentification.app/blog/light-blue-crystal-identification) for habit and luster comparisons.
Example 4 — Banded, translucent slice with concentric rings: This pattern almost always suggests agate (a chalcedony variety). Band width, translucency, and colors help refine whether it’s a common landscape agate, a fortification agate, or a dyed slice intended for jewelry. These visual signatures make agate one of the easiest stone types to identify at a glance from photos.
- Faceted + transparent + brilliance → prioritize gem minerals (beryl, tourmaline, garnet).
- Opaque + waxy sheen → look at jaspers, jade, and some chalcedonies.
- Conchoidal fracture + glassy surfaces → consider obsidian or glass.
- Concentric banding → agates and many chalcedony varieties.
Limitations
Photos and visual clues are powerful for narrowing possibilities, but they cannot confirm treatment, synthetic origin, or exact species in many cases. Many stones are routinely dyed, filled, or otherwise treated to enhance color and transparency—treatments that are often invisible in photos. For example, heat-treated sapphires and dyed agates can mimic the appearance of naturally saturated stones.
Lookalikes and imitations are common. Glass, plastic, and synthetic crystals can reproduce color and luster so well that visual assessment alone is misleading. Some synthetics show telltale curved growth lines or gas bubbles under magnification, which is why a loupe or microscope inspection is a common next step for higher-value items.
The next examination should fit the object and the question. Apparent heft, a photo, or a household scratch attempt is not a substitute for a properly interpreted measurement. Qualified examiners can explain which observations or instruments are appropriate, what those methods can establish, and whether preparation or testing could affect the specimen. When value, rarity, treatment, or authenticity matters, retain a visual hypothesis and seek professional verification before making a stronger claim.
Do not assume safety or edibility from appearance. Stones that look like amber or resin might be modern plastics that can off-gas or react differently under heat. For any use that implies contact, wear, or ingestion (e.g., worry about toxicity in medicinal uses), consult an expert who can perform chemical or spectroscopic tests.
- High confidence outcomes: broad family assignment (e.g., 'agates', 'obsidian', 'quartz family').
- Partial confidence outcomes: likely species when multiple clues align but treatment or synthetic origin remains untested.
- Low-confidence outcomes: exact variety, treatment status, origin, or authenticity—these require lab tests.
- When to verify: before selling, insuring, or assigning market value, and any time health or safety is a concern.
Related guides
Next step: organize your rock-identification observations
Use the Rock Identifier at https://stoneidentification.app/tools/rock-identifier to compare a clear image with your notes about visible texture, pattern, and context. Treat any suggested match as a starting point for learning and further reference checks. Keep the specimen intact, and seek a qualified examiner when the identification affects value, authenticity, or another important decision. The tool does not replace the measurements or professional interpretation required to confirm a difficult specimen.
Take the next step →Frequently asked questions
How can I use a stone identification guide when I only have a photo of the stone?
Take clear photographs in more than one lighting condition with a size reference, and record visible color, transparency, luster, patterns, and the specimen's context. Compare several features with documented references and keep a shortlist rather than choosing from color alone. Preserve the object while uncertainty remains: scratch and streak tests can alter it and are not automatically harmless follow-up steps. Ask a qualified examiner about appropriate testing when confirmation matters.
What visible features in a photo most reliably separate common stone types?
Transparency, luster, and patterning are the most reliable visible features. Transparent stones with vitreous luster are more likely to be gems; translucent with banding points to chalcedony-family stones; opaque with granular texture suggests jaspers or some metamorphic rocks. Inclusions and fracture pattern add second-level evidence—bubbles point to glass, while needle-like inclusions suggest natural crystals.
When should I trust visual identification versus sending a stone for testing?
Trust visual identification for hobby purposes—sorting, casual collecting, and getting a working hypothesis. Send a stone for professional testing when the item has significant monetary value, when the identification affects safety or legality, or when you need confirmation of origin, treatment, or synthetic vs. natural status. For sales, appraisals, or legal matters, lab reports from accredited gemological labs are the gold standard.
How do I interpret stone visual clues when color looks altered or unusual in photos?
Lighting, white balance, and saturation can change apparent color. Request additional photographs in consistent lighting and compare the whole specimen with documented examples. Surface color pooling or unusually uniform color can raise questions, but a photograph does not establish a treatment. Do not rub, scrape, apply solvent, or test for color transfer on an uncertain specimen without appropriate professional guidance; preserve its condition and record the uncertainty.