
Gems ID: A Practical Photo-First Identification Checklist
Start a gems ID record with color, transparency, luster, visible shape and readable labels. Compare candidate stones and note what needs gemological testing.
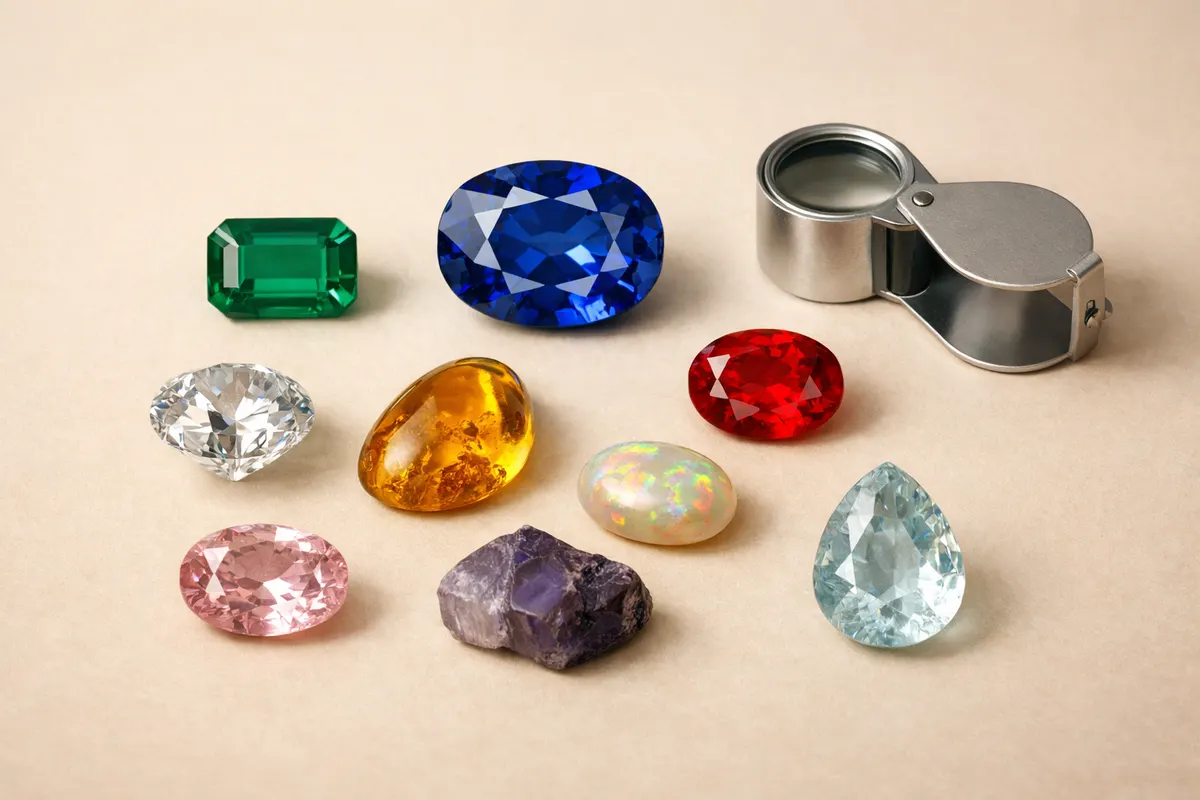
Quick answer: what a photo can tell about gems id
For a fast gems id from a photo, expect useful but partial answers. A well-lit, sharp picture can show color, transparency, surface luster, and some crystal shapes — traits that let you narrow candidates (for example: green transparent = likely peridot, tourmaline, or glass).
Photos rarely prove a gem’s species or value. Tests like refractive index, specific gravity, and spectral analysis are needed for reliable identification and to detect treatments or synthetic material. Treat any single-photo ID as a working hypothesis, not a final determination.
Use photos as a triage tool: they help prioritize follow-up checks and decide if you need a gem lab, a local appraiser, or just more clear photos. With the right images and notes, you can often reach medium confidence for common gems and flag likely lookalikes early.
- Photo strengths: color, transparency, cut/shape, surface luster, visible inclusions.
- Photo limits: internal optical properties, exact hardness, specific gravity, proven authenticity.
- Best-case use: narrow to a small group of candidate gems and plan next tests.
What gems id means for a photo-first approach
Gems id here means assembling observable evidence from pictures and context, then judging how convincing those cues are. A photo-first approach emphasizes visual properties: color range, body tone, transparency, and how the stone interacts with light. Those cues are often decisive for everyday questions like “Is this quartz or glass?” or “Might this be amethyst?”
That approach accepts uncertainty. For example, a yellow, faceted stone in a ring could be citrine, topaz, or heat-treated quartz; photos will show hue and cut but won’t reliably show refractive index or treatments that distinguish them. The goal is to move from ‘unknown’ to ‘probable’ and list the minimal tests needed to reach ‘confirmed.’
Context matters. Where a stone came from, how it was cut (cabochon vs. faceted), and any accompanying metalwork or paperwork change the prior probability of different species. A backyard pebble with a glassy fracture is more likely common quartz than an untreated emerald, even if green in a photo.
- Prioritize visual traits first, then add context (origin, setting, paperwork).
- Use photos to identify lookalike groups, not to declare final identity.
- Turn the photo’s clues into a short list of follow-up steps (tests, measurements, or expert checks).
Key visual and contextual clues for gems id
Start with the basics: color, saturation, and tone. Natural gems often show subtle zoning, mixed tones, or uneven saturation. Uniform, neon, or patchy color can be a sign of dyed material or glass. Note how color shifts between angles — pleochroism (different colors on different crystal axes) is diagnostic for some gems like tanzanite or iolite.
Luster and transparency are next-level clues. A vitreous (glass-like) luster is common in quartz-family gems; an adamantine (brilliant) luster points toward diamonds and some high-index stones like sphalerite. Opaque stones with waxy or greasy luster suggest jaspers, opals (play-of-color excepted), or chalcedony varieties. Transparency combined with bright dispersion (color flashes) can indicate faceted gemstones with higher refractive indices.
Look for surface and internal features. Inclusions — feathers, needles, mineral crystals, or silk — often reveal natural formation. Curved striae, gas bubbles, or swirls often indicate glass. Crystal habit (if visible) is decisive: well-formed hexagonal prisms point to quartz-family minerals; tabular cleavage faces suggest feldspar or beryl.
Contextual clues: setting and provenance. A loose rough stone from a riverbed is most likely a common mineral (quartz, feldspar) rather than an expensive faceted gem. Hallmarks, paperwork, or a known seller raise the prior probability of authenticity but don’t replace testing.
- Color & zoning: natural gems often have uneven or zoned color; consistent bright dye suggests treatment.
- Luster: vitreous (glass), greasy, waxy, or adamantine (brilliant) point to different families.
- Transparency & dispersion: look for flashes of spectral color in faceted stones.
- Inclusions: natural crystals, needles, or feathers imply natural origin; gas bubbles suggest glass.
- Crystal habit / cleavage: prisms, rhomboids, or tabular faces can narrow candidates quickly.
- Context: provenance, setting quality, and paperwork shift probability but don’t prove identity.
Step-by-step workflow to go from photo to confident gems id
1) Prepare and photograph carefully. Use daylight or a neutral artificial light, include a ruler or coin for scale, shoot multiple angles (table, pavilion, profile), and take at least one macro image focused on any visible inclusions or surface details. A single clear photograph greatly improves the chance of a useful ID.
2) Make an initial visual shortlist. Based on color, luster, and habit, pick 2–4 candidate gem types. For example, brownish red and high luster might suggest garnet or zircon; yellow-brown with glassy fractures could be citrine or glass. Write down the top matches and why you prefer each.
3) Do low-impact physical checks if you have the stone in hand. “Heft” the stone to assess relative density, compare hardness with a non-precious scratch test only on unmounted rough material (never on jewelry you plan to keep), and use a loupe (10x) to inspect inclusions. If you’re uncomfortable scratching, skip it — it permanently alters the stone.
4) Use targeted non-destructive tools when possible. A cheap pocket refractometer or a specific-gravity kit can turn a probable ID into a confident one. A polariscope or dichroscope (even a simple polarizing clip) reveals double refraction and pleochroism, which are often decisive.
5) Decide on verification level. For casual interest, a confident visual ID plus notes may be enough. For resale, insurance, or legal disputes, arrange gemological testing (refractive index, spectroscopy, or a lab report from a recognized gem lab). Document the whole process and preserve original photos and notes.
- Photo checklist: scale, neutral lighting, multiple angles, macro on inclusions.
- Shortlist: pick 2–4 candidate gems with reasons tied to visible traits.
- Safe checks: heft and loupe inspection; avoid destructive scratch tests on mounted stones.
- Tools that help: pocket refractometer, polariscope, dichroscope, and SG kit.
- Verification: lab testing when you need a definitive result for value or authenticity.
Practical examples of gems id from common situations
Example 1 — Backyard pebble: A small green translucent pebble found at a stream. Photo shows green color, vitreous luster, and conchoidal fracture. Likely candidates: green quartz (prasiolite), prehnite, or altered glass. Confidence: low-to-medium from photos alone. Recommended next steps: a heft comparison, loupe inspection for gas bubbles (glass), and, if still promising, SG or RI measurement.
Example 2 — Heirloom faceted ring: A yellow faceted stone in a vintage ring with minor wear on the table. Photos show warm yellow tone, high brilliance, and no obvious inclusions at 10x. Likely candidates include heated quartz (citrine), topaz, or yellow sapphire. Confidence: medium from photos; treatment or species indistinguishable by image. Recommended next steps: ask for any paperwork, avoid destructive scratch tests, and seek refractive-index measurement or a gemologist’s report if value matters.
Example 3 — Online listing photo: A bright blue cabochon sold as ‘lapis-like’ with visible white flecks and a duller waxy luster. The photo’s texture and inclusions suggest dyed howlite or a low-grade lapis substitute rather than natural lapis lazuli. Confidence: medium-high for identifying it as an imitation or treated material. Recommended next steps: request origin details, multiple photos under different lights, or a refund/return if authenticity is claimed but unsupported.
Across these examples, the pattern is consistent: photos let you triage and prioritize follow-up checks. For many casual identifications a confident photo-based call is enough; for higher-stakes situations, move quickly to non-destructive testing or professional verification.
- Backyard find: photos help rule out expensive minerals quickly.
- Heirloom jewelry: photos show condition and likely families; lab tests needed for value.
- Online purchases: image clues often reveal imitations or treatments; insist on provenance.
Limitations and when photo-based gems id is not enough
Separate three practical confidence levels: high, medium, and low. High-confidence photo IDs are rare and reserved for very distinctive stones (e.g., classic opal play-of-color, a well-formed quartz crystal with recognizable habit). Medium-confidence outcomes mean you can narrow to a small group (e.g., ‘likely garnet-type’ vs. ‘more likely spinel’) but still need RI or SG to confirm. Low-confidence cases are when photos can’t rule out lab-only distinctions — treated vs. natural material, synthetic vs. natural, or closely related species with overlapping visual traits.
There are specific technical limits photos cannot overcome. Refractive index, birefringence, and specific gravity require instruments. Spectroscopic peaks that reveal trace elements or treatment signatures are invisible in photos. Similarly, many synthetics mimic natural inclusions and polish so well that visual inspection alone is misleading.
Safety and valuation boundaries: never assume a stone’s edibility, toxicity, or monetary value from a picture. Do not taste or lick stones to test properties. Never rely on a photo when legal or financial decisions depend on identity or grade. When in doubt, collect documentation and choose an accredited gem laboratory or certified appraiser for final validation.
- High confidence from photos is uncommon; reserve it for visually distinctive gems.
- Photos cannot replace instrumental tests for species confirmation or treatment detection.
- Don’t make safety, toxicity, or legal decisions based on a photo alone — seek professional testing.
Related guides
Next step: use the app and guided ID pages to act on your gems id
After you’ve checked the visible clues and followed the photo checklist, use Stone Identifier - Gemalyze as a fast way to organize your evidence and decide what to test next. The site’s identification guide (https://stoneidentification.app/identify/gemstone-identification) and homepage (https://stoneidentification.app/) explain non-destructive next steps and link to tools that help prioritize lab testing or local appraisers. Treat the app as a first-pass triage — it helps turn photos and notes into an informed plan, not a conclusive certification.
Take the next step →Frequently asked questions
Can I identify a gem from a single photo?
You can often narrow a gem to a small group from a single, well-shot photo — by color, luster, transparency, and visible inclusions — but a single image rarely proves a gem’s exact species, treatment status, or value. Treat the photo as a starting point: it’s useful to triage likely matches and decide which non-destructive tests or professional checks are worth pursuing.
What’s the fastest visual clue for gems id in photos?
Color pattern, luster, and inclusions are the quickest clues. Color zoning, pleochroism (color change by angle), and certain inclusion types (needles, crystals, gas bubbles) often separate natural gems from glass or dyed material. Paired with a scale reference and a macro shot of inclusions, these visuals let you form a quick, evidence-backed shortlist.
How should I photograph a stone to improve identification?
Use diffused daylight or neutral LED light, include a ruler or coin for scale, shoot multiple angles (table, profile, pavilion), and take at least one macro close-up on any inclusions or surface features. Avoid colored backgrounds that alter perceived hue; neutral gray or white backgrounds work best. Label each image with context: where it was found, weight or dimensions if known, and any paperwork or hallmarks.
When should I get a professional gem lab report?
Get a lab report when the stone’s identity affects money, heritage, or legal issues: resale, insurance, estate division, or authenticity disputes. If your photo-based checks show conflicting or high-value possibilities (for example, the stone could be an emerald, synthetic spinel, or treated beryl), a recognized gem lab’s RI, SG, and spectroscopic analysis will give the definitive answer.