
How Can You Tell If a Ruby Is Real: A Practical Guide
Understand which clues a photo can show and which tests you need to verify how can you tell if a ruby is real, plus safe next steps to confirm.
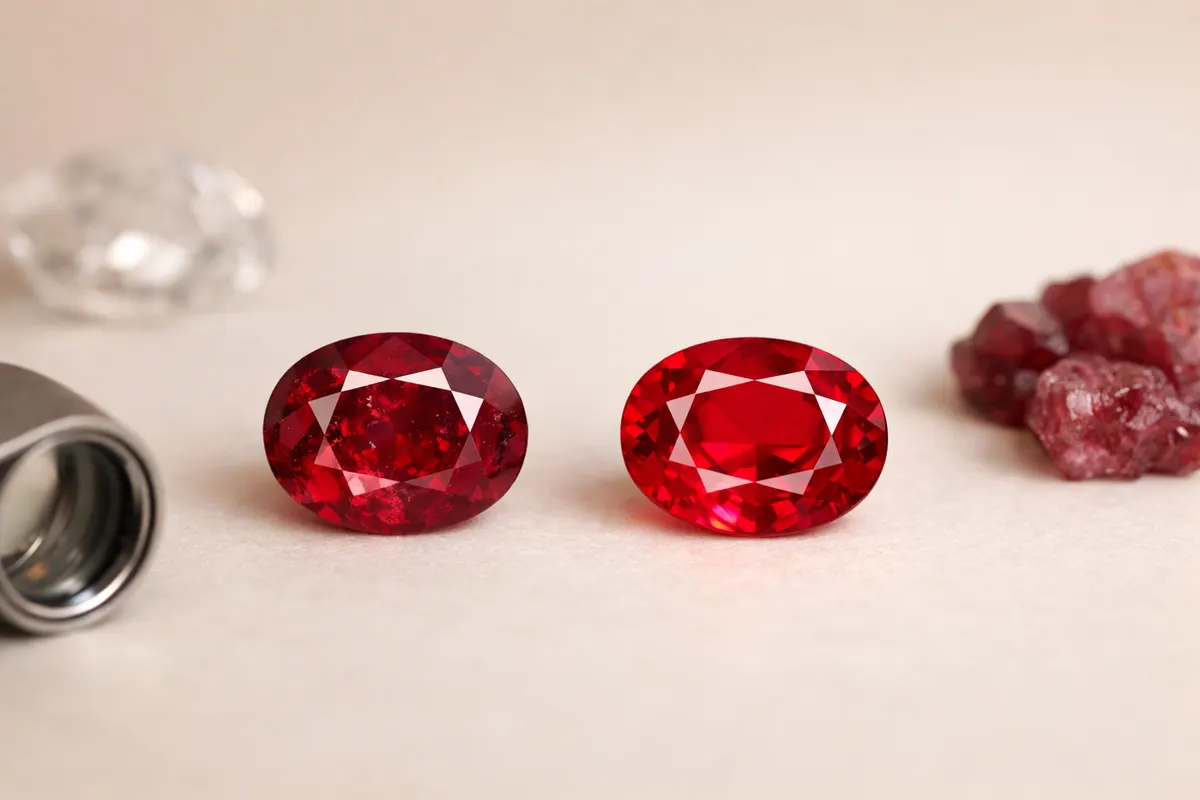
Quick answer: how can you tell if a ruby is real
How can you tell if a ruby is real? In photographs and casual inspection, the strongest clues are color saturation, type and pattern of inclusions, surface wear consistent with corundum hardness, and reactions under different light (notably red fluorescence in many natural rubies). A convincing photo set — sharp close-ups, a face-up view under daylight, and a flash image — can often rule out obvious glass imitations, dyed quartz, or certain lab-grown glass-filled stones, but it cannot prove natural origin or treatments definitively.
For a reliable answer beyond 'likely' or 'unlikely' you need one or more instrument tests (refractive index, specific gravity, or spectroscopy) and a trained eye to read inclusions and growth patterns. Use photographic evidence to prioritize follow-up: document what you see, compare with known lookalikes, and treat the image-based ID as a first pass rather than a final authentication.
What it means to identify a ruby from photos
Identifying a ruby from a photo means assessing visual and contextual features that are visible without instruments. Photos can show color hue and saturation, surface condition, cut style, and some internal features (inclusions or trapped gas bubbles). These details help narrow possibilities: whether a stone is likely corundum (the mineral family that includes ruby and sapphire), or more likely a different red gem like garnet, spinel, or glass.
However, a photo cannot reveal certain critical facts: whether the stone is natural versus lab-grown corundum, whether it has been heat-treated or filled, or its exact refractive index. Those distinctions often require microscopy, refractometry, or lab-grade spectroscopy. In practice, photographic ID is a triage tool — it helps you decide if the stone needs professional testing, offers a reasonable consumer-level assessment, and documents the piece for resale or appraisal contexts.
Context matters as much as the image. Provenance (where the stone came from), how it was acquired, and any paperwork or prior appraisals are part of the identification picture. A well-lit photo set combined with a clear story about origin makes a more useful initial assessment than images alone.
Key photographic clues that suggest a real ruby
Color and hue: Natural ruby is corundum colored by chromium; its classic red ranges from pigeon blood (intense red) to purplish- or orangey-red. In photos, look for depth without a plastic sheen: the color should remain rich across viewing angles rather than sitting only on the surface. Overly uniform, saturated red with obvious surface streaks can indicate dyed material or glass.
Internal features and inclusions: Magnified photos can reveal mineral crystals, needle-like rutile (silk), fingerprint-type liquid inclusions, or healed fractures—features commonly seen in natural rubies. By contrast, gas bubbles that are perfectly round and abundant typically point to glass or resin-based imitations. Growth zoning and curved striae are clues used to separate natural corundum from many synthetics.
- Fluorescence in daylight or UV: Many natural rubies fluoresce red under short-wave UV, but fluorescence alone isn’t determinative because some synthetics also fluoresce.
- Surface wear and facet edge crispness: Corundum is hard (9 on Mohs), so chips and scratches behave differently than on softer lookalikes; worn facets with crisp facet junctions often indicate genuine gem rough handling.
- Cut style and facet reflections: High-quality rubies are cut to preserve color, sometimes resulting in deeper pavilion angles and certain reflection patterns identifiable in photos.
- Contextual clues: Hallmarks on setting, catalog or provenance photos, and seller history increase confidence when photographic evidence alone is equivocal.
Step-by-step checks for a photo-based ruby ID
Start by photographing the stone in three controlled ways: a daylight/indirect sunlight shot, a close-up macro with a neutral background, and a flash or LED light image to reveal surface and internal reflections. These three perspectives show color consistency, internal features, and how the stone responds to intense light. Include a size reference (millimeter scale or ruler) and a plain white card for color calibration.
Next, inspect the images at high magnification (10x–20x). Look for natural inclusion types—rutile silk, mineral crystals, and irregular fingerprints—that align with natural corundum. Note whether bubbles are present and whether growth zoning appears straight (typical of natural corundum) or curved (often synthetic flame-fusion). Record all features with notes and timestamps so you can share them with a gemologist if needed.
If the photos suggest natural corundum but questions remain (for example, signs of filling, unusual clarity in a large stone, or a strikingly uniform color), plan for a follow-up: a refractive index reading, specific gravity, or a professional loupe/microscope inspection. These tests are the minimum to move from 'likely' to 'probable' or 'confirmed' categories.
- Photo checklist: daylight image, macro close-up, flash/LED image, scale, and white balance card.
- Magnification clues to log: type and pattern of inclusions, presence of gas bubbles, growth zoning shape, and surface residue or filling flashes.
- When to escalate: unusually high clarity for size, visible filling residues, seller claims of untreated origin without paperwork, or mismatch between paperwork and visual clues.
Examples: common real vs fake ruby scenarios
Example 1 — Heavily included, strong red: A ring photographed in daylight shows a deep red center with needle-like inclusions and a tiny crystal inclusion near the girdle. Macro shots show irregular ‘fingerprint’ features and no spherical bubbles. These signs point toward natural ruby; a gemologist’s microscope check and a basic RI test will usually confirm corundum and reveal whether the stone is untreated or heat-treated.
Example 2 — Bright, glassy red with round bubbles: A pendant photograph shows very vivid, almost fluorescent red with round air bubbles visible in multiple facets. The stone’s interior looks homogenous and the bubbles are perfectly circular. This pattern is classic for glass or lead-glass imitations rather than natural ruby.
Example 3 — Eye-clean red with unusual brilliance: A loose stone photographed from several angles appears nearly flawless for its size and shows curving growth lines under magnification. Curved striae and exceptional clarity are typical indicators of flame-fusion synthetic corundum. In such cases, instrument testing will usually classify the piece as synthetic despite its gem-like look.
Example 4 — Red spinel or garnet lookalike: A cabochon photographed with a strong surface luster but lacking internal silk and showing different pleochroism in side views can be a garnet or spinel. Comparing photos to a trusted visual guide for red gemstones helps here—see our Red Gemstones overview for side-by-side visual cues and common lookalikes.
Limitations: what photos cannot prove about a ruby
Photos cannot reliably prove natural origin, confirm treatments like heat or glass filling, or determine exact market value. Many treatments change the stone’s internal structure at a microscopic or chemical level, and those changes are visible only under specialized microscopes or by spectroscopic analysis. Even a gemologist’s loupe has limits compared with lab instruments.
Photos may also mislead because of color rendering, white balance, and post-processing. A smartphone image can exaggerate saturation or hide inclusions depending on lighting and focus. For any high-value or emotionally important piece, use photos as documentation and a starting point, not as the sole evidence for purchase or insurance decisions.
When to seek professional verification: if the stone is large and eye-clean but priced like a small commercial gem, if paperwork is missing or inconsistent, or if the stone shows signs of filling or unusual clarity. Trusted next steps include a local certified gemologist, a university geology department with gem labs, or a recognized gem lab for full identification and treatment disclosure.
Related guides
Next step: use a photo-first check to act faster
If your photos point toward corundum but questions remain, use a photo-first tool to organize evidence and get a prioritized next-step checklist, or schedule a local gemologist inspection. For an efficient next pass, visit the site’s visual guides and testing tools (including the crystal identifier and our Real Crystal Check tool) to document images and decide whether to pursue formal lab testing: https://stoneidentification.app/tools/real-crystal-check. Treat app-based checks as a fast first pass, not a final authentication.
Take the next step →Frequently asked questions
Can a phone photo prove a ruby is real?
A phone photo can provide useful clues — color, visible inclusions, and surface condition — but it cannot prove natural origin or reveal treatments like heat or glass filling. Use photos to triage and document, then plan instrument-based tests or a gemologist exam for confirmation.
What visual signs most reliably show a stone is not a ruby?
Round gas bubbles, wildly uniform color with a glassy sheen, or a surface that shows dye pooling or residue are strong signals the stone is glass, dyed quartz, or a composite. Curved growth lines suggest certain synthetic processes rather than natural corundum.
How can I use photos to prepare for a professional appraisal?
Provide a set of clear images: daylight face-up, macro close-ups, a flash image, and a scale reference. Note provenance, seller details, and any certificates. High-quality photos help the appraiser prioritize tests and reduce the time and cost of examination.
When is it safe to rely on photo identification alone?
Photo identification can be adequate for low-value or casual purposes (e.g., identifying a family heirloom’s likely type), but never for high-value purchases, resale, or insurance. If the outcome affects money or legal documentation, follow up with instrument testing or a lab report.