Diamond Identification
Diamond Identification — What to Look For, With Real Examples
Diamond identification guidance focused on photo-visible clues, what a Stone Identifier result shows, and safe next checks before lab verification.
Diamond identification starts with visual clues that a clear photo can capture. Stone Identifier - Gemalyze helps you narrow a stone to the diamond family, surface treatments, likely color range, and whether the piece needs closer laboratory checks — all as a first-pass result, not a certificate.
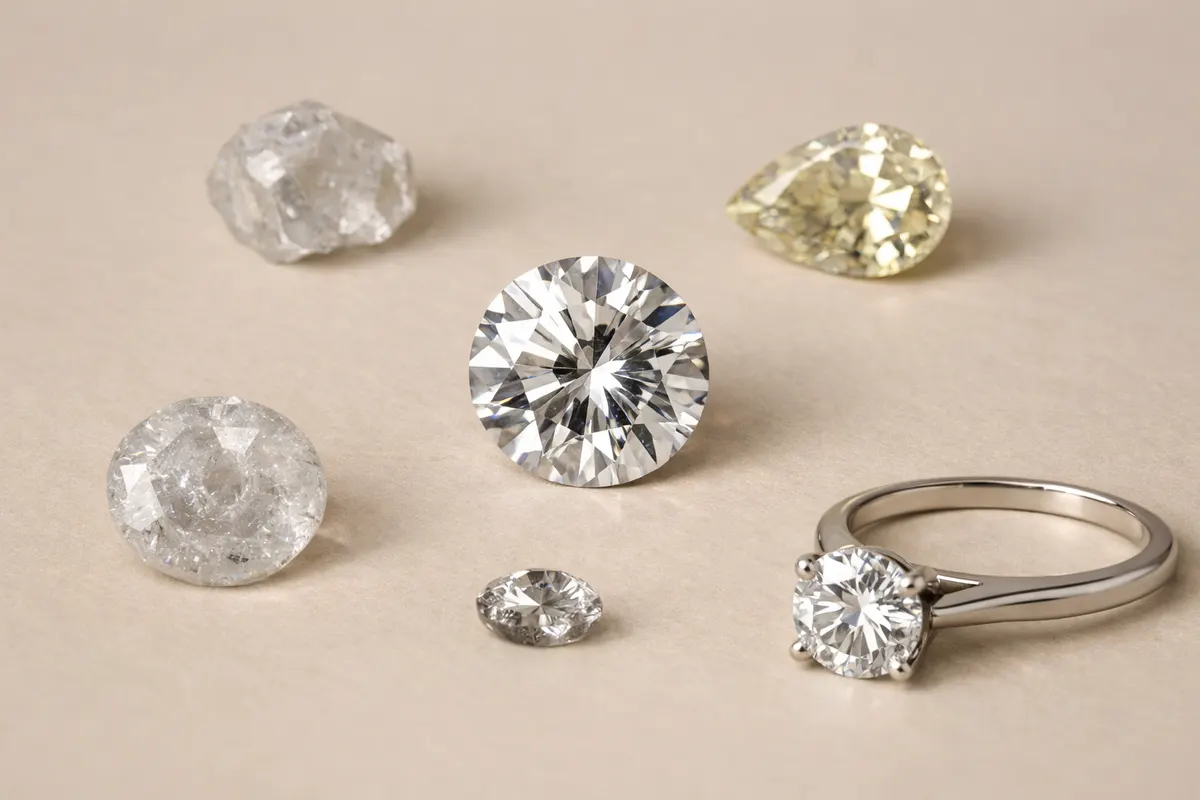
A single photo can show hardness clues, facet pattern, wear on mountings, and reflective behavior that point toward real diamond versus simulants. Use these visible signals to decide if you should keep the item as-is, run simple home checks, or seek professional lab grading.
We anchor every reported field to what we can reasonably infer from images: apparent material class, visible damage or wear, probable clarity banding visible at the photo scale, and suggested next steps. The app’s output is a starting identification that lists confidence and recommended verification methods.

How identification works
Step 1
Snap a photo
Take a clear, well-lit photo of your item in the Stone Identifier - Gemalyze app.
Step 2
Get an instant identification
The app reads the visible clues and returns the closest matches in seconds.
Step 3
Review the details
Check the attributes, rarity, and estimated value range before deciding your next step.
How to identify by eye
Before you submit photos to the app, inspect the piece for a handful of signals that are both fast and informative. Good photos plus a short visible-checklist let Stone Identifier focus on the right candidate matches and reduce false positives from glass, cubic zirconia, or moissanite.
Prioritize high-contrast macro photos of the crown and pavilion, a picture of the mount’s inside area (for stamps), and a side view that shows facet junctions. The most useful observations are about how light returns, edge sharpness, and any internal inclusions or flash patterns visible at the photo scale.
Use a loupe or a sharp macro photo to look for marks and mounting evidence: laser inscriptions, hallmarks, or repaired settings often change how reliable a single-photo ID can be and point to whether the stone was recut or treated.
- Facet reflections: sharp white flashes with small colored dispersion often indicate diamond’s refractive behavior; fuzzier colorful flashes can suggest moissanite.
- Edge and facet sharpness: crisp facet edges and tight facet junctions favor diamond over softer simulants that round with wear.
- Surface wear: chips on the girdle or sharp crown facets are consistent with diamond hardness; heavy surface abrasion suggests softer simulants.
- how to spot fake diamonds tests you can do at home — quick at-home checks like the fog test or reading small print through the stone can help you prioritize verification before sending photos.
- Mount and stamp clues: platinum or high-karat yellow gold mountings and laser-inscribed numbers often accompany genuine diamonds but are not definitive alone.
- Color and fluorescence hints: very strong blue fluorescence under UV or an oddly warm body tone in bright daylight can be diagnostic for certain treatments or simulants.
Exactly what a Stone Identifier diamond result shows
A Stone Identifier result for diamond identification focuses on concise, image-derived fields you can act on. The app will report the likely material family, visible clarity signals, estimated color band, and an assessment of photo confidence rather than a valuation or certificate claim.
Each result explains the photo cues used (for example: facet pattern, light return, inclusions visible at this magnification) and recommends next steps when the image is ambiguous. If the app sees evidence of treatment or recutting, that will be flagged for follow-up rather than asserted as definitive.
Because a lab grade requires gemological instruments, results include an explicit ‘verification recommended’ note when the photo evidence is limited or when the stone’s intended use (sale, insurance, appraisal) demands a certified report.
- Material class (diamond vs. likely simulant) with confidence level
- Visible clarity signals (not a lab clarity grade) and example crop that shows the inclusion
- Estimated color band (photo-visible range) and fluorescence note if present
- Treatment flags (e.g., fracture-filling or surface coating) when evidence appears in images
- Recommended next steps: home checks, lab grading, or jeweler inspection
- diamond clarity grading if to i3 explained — short note on what very low clarity looks like in photos and when you must seek a lab to confirm an I3-grade claim
Most common stones mistaken for diamonds
Photos often show stones that look diamond-like but are actually moissanite, cubic zirconia (CZ), or glass. Each of these lookalikes has photo-visible giveaways: moissanite shows extra brilliance and double refraction, CZ is often too perfect and warm, and glass lacks sharp facet return.
Stone Identifier highlights the tell-tale differences it can detect from images, then recommends the minimal follow-up checks to separate these categories. When photos are inconclusive, the app warns that instrument testing is recommended.
Use the following quick cues when you examine photos to prioritize whether a live test or lab report is needed.
- Moissanite: strong colorful fire and thermal conductivity similar to diamond — photos can show doubled facet images under some angles.
- Cubic zirconia: very high dispersion with softer facet edges and often slightly rounded facet junctions.
- Glass or paste: uneven polish, bubbles, or surface wear that suggests a much lower hardness than diamond.
Frequently asked questions
How to spot fake diamonds tests you can do at home if I only have photos?
If you only have photos, start with the visual checks: look for overly perfect facet symmetry, excessive colorful dispersion, and unusually warm body color — these favor simulants. Include a clear macro of the pavilion and a photo with text behind the stone; diamonds typically don’t magnify printed letters into legible text. Use Stone Identifier - Gemalyze for a photo-based first pass, and follow the app’s recommendation for in-person or lab checks when confidence is low.
Diamond clarity grading if to i3 explained — how should I interpret low-clarity photos before a professional grade?
Photos that show heavy clouding, large dark crystals, or obvious surface-reaching cavities suggest very low clarity consistent with I2–I3 ranges, but photographs alone cannot substitute for a loupe inspection or laboratory report. If a photo indicates this level of inclusions, Stone Identifier will flag the need for certified grading before you rely on any value or authenticity claims.
Can a clear photo prove a diamond is authentic?
No single photo can prove authenticity. High-quality images let Stone Identifier narrow the candidate to diamond or a likely simulant and point out visible treatments, but a certificate from an accredited lab is required for definitive authenticity and grading.
When should I send a stone for lab testing after a photo ID?
Send a stone for lab testing if the outcome affects sale, insurance, or legal matters, or if the app reports low confidence or detected treatment. Immediate lab testing is also advisable when photos show conflicting signals — for example, diamond-like facet return combined with unusual staining or repairs on the mounting.
Related guides
Use Stone Identifier - Gemalyze as your first photo check
After you’ve checked the visible clues above, capture sharp macro photos and run them through Stone Identifier - Gemalyze for a focused, image-based identification. The app gives a confidence level, shows the photo cues used, and recommends whether you need lab grading or an in-person jeweler inspection.