
Identifying Precious Stones: A Practical Photo-First Guide
Identifying precious stones from photos: what visual clues matter, how to document them, and which follow-up checks reduce uncertainty before you act.
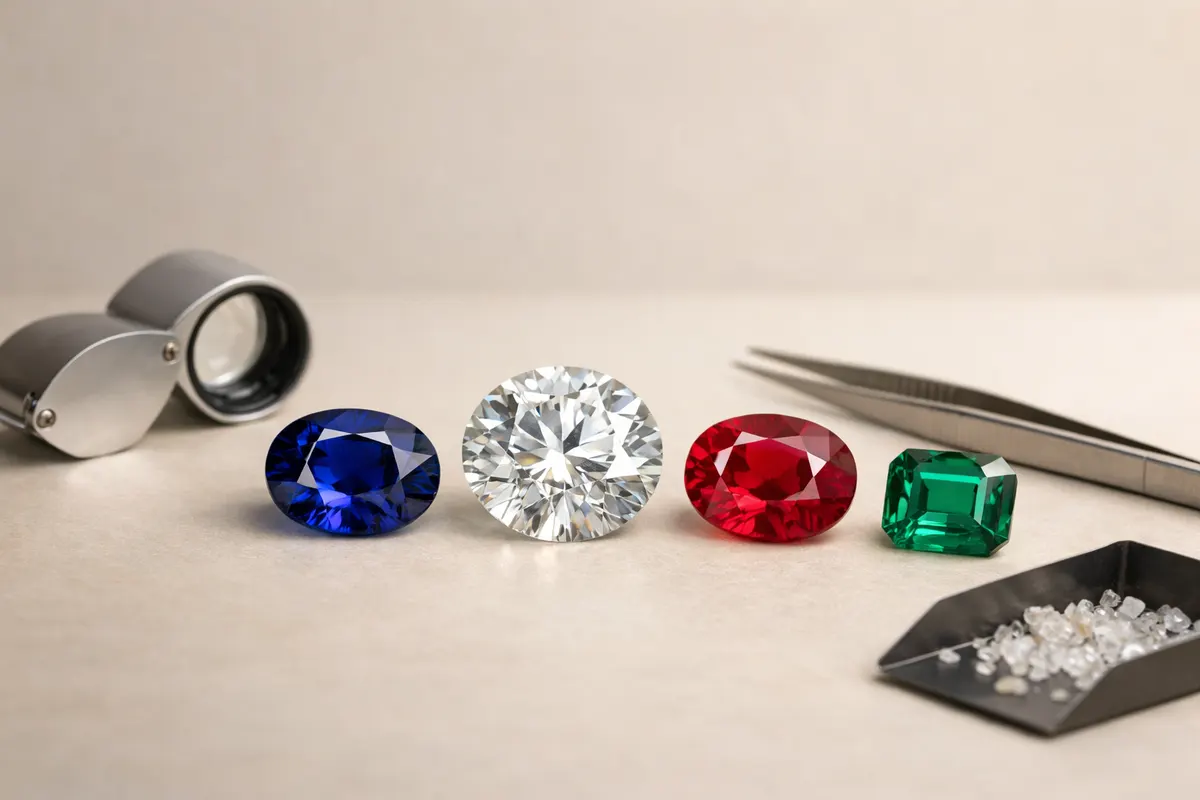
Quick answer for identifying precious stones
Identifying precious stones from images is often possible to a useful degree — you can shortlist candidates and rule out obvious lookalikes — but photos rarely prove origin, treatment history, or absolute authenticity.
Color, cut, surface reflections, and visible inclusions are the strongest photo-based clues to narrow a stone to a small group (for example sapphire vs. sodalite, or emerald vs. green glass). Size, setting, or accompanying paperwork provide context that changes the odds, too.
If your goal is practical — deciding whether a piece is likely valuable enough to appraise, or whether it’s a common simulant you can discard — a careful photo exam plus the steps below often gets you most of the way. If you need final proof for resale, insurance, or legal purposes, lab testing and an in-person appraisal are required.
- Photos can reliably show color, transparency, surface wear, and some inclusions.
- Photos cannot prove origin (geographic source), certain treatments (like heating or fracture filling), or exact value.
- Treat the photo-first identification as a triage: shortlist possibilities, then verify with hands-on tests or a lab when stakes are high.
What identifying precious stones means in practice
When people search for identifying precious stones they usually mean: “What gem is this, and is it a precious gem (ruby, sapphire, emerald, diamond) or something else?” That question bundles three distinct tasks: naming the mineral or material, estimating whether it’s a natural precious stone, and judging whether it’s worth professional verification.
A photo helps with the first task—narrowing the mineral family—because color, clarity, luster (how light reflects), and visible internal features are directly visible. For example, a transparent, intensely saturated red with conchoidal fractures is unlikely to be a natural ruby; conversely, a red stone with dense, silky rutile inclusions is probably a garnet or tourmaline, not glass.
The second task—deciding natural vs. synthetic or treated—usually goes beyond photos. Some synthetic processes leave telltale visual signatures (curved growth lines in flame-fusion synthetics, or certain gas bubbles), but many modern synthetics and treatments are designed to appear natural under casual inspection.
The third task—value or market grade—depends on measurable properties (weight, refractive index, specific gravity, cut quality) and paperwork (provenance, certificates). Photos inform a pre-assessment and help prioritize stones for lab testing or appraisal, but they’re not a substitute for measurements and documentation.
Key clues
Start with a consistent set of photos: one face (table) view, one profile, one back, and a close-up under diffused daylight. Each view reveals different clues: the face view shows color and brilliance, the profile shows depth and cut proportions, and the back can reveal internal structure or glue/grit inside a setting.
Consider context: a small cabochon set in low-cost metal posted on a marketplace has different prior odds than a loose, expertly faceted stone with paperwork. Ask about provenance, previous appraisals, and any seller history; that contextual information changes how you interpret visual clues.
Apply these core visual checks in order. Treat them as a checklist you can tick off from photos to raise or lower confidence in a candidate identification.
- Color and tone: Note saturation, hue shifts, and zoning. Natural stones often show subtle zoning; synthetic or glass pieces can display flat, uniform color.
- Transparency and brilliance: Diamonds and high-refractive-index gems sparkle differently than quartz or glass. Look for contrast patterns and fire in well-lit photos.
- Inclusions and internal features: Needles, feathers, twinning, and mineral crystals often point to natural origin. Gas bubbles and curved growth lines suggest glass or flame-fusion synthetics.
- Surface features and wear: Recut facets, nicks, or polish lines reveal history; consistent machine marks may indicate simulants or mass production.
- Cut and facet style: Certain facet patterns and proportions correspond to gem types and historical cutting styles — compare with known examples.
- Setting and mount clues: Claw style, bezel thickness, and hallmarking on metal settings provide economic and provenance context that affects likelihood.
Step-by-step workflow to identify a precious stone from photos
Use a consistent, evidence-driven workflow so you don’t over-interpret a single flattering image. The goal is to move from broad categories to a short list of likely materials, then decide whether to accept that result or pursue hands-on testing.
Below is a practical sequence you can follow with just a phone camera and a basic loupe or magnifier. Each step is designed to increase or decrease confidence; stop when confidence is high enough for your decision (e.g., casual curiosity vs. selling).
Keep notes with each photo: lighting conditions, camera used, and any information from the seller or owner. Those notes become crucial if you later present the case to an appraiser or lab.
- 1) Photograph methodically: table, profile, back, inclusion close-ups, and a scale reference (coin or ruler). Use natural diffused daylight for the most neutral color.
- 2) Note size and weight if available. A 1-carat diamond-sized stone that weighs several carats by heft is likely an imitation of a different material.
- 3) Compare color and brilliance to reference images of likely gems. Use trusted visual guides and the site’s “Gemstone Identification” page for side-by-side examples.
- 4) Inspect inclusions at 10x magnification. Look for needles, crystals, or silk (typical of natural corundum and emerald) versus round bubbles (glass) or curved striae (some synthetics).
- 5) Check reaction to light: some gems show pleochroism (different colors from different angles) while glass and many synthetics do not. Rotate the stone and photograph the changes.
- 6) Search for tool or production marks: faceting lines, glue trails, or reconstituted textures that suggest assembled or composite stones.
- 7) Make a weighted shortlist (e.g., likely sapphire, possible spinel, unlikely garnet) based on combined evidence and note your confidence level for each.
- 8) Decide next steps: home tests (scratch, specific gravity with careful handling), a local jeweler’s quick inspection, or a gem lab for refractive index, spectroscopy, and certificate depending on value and risk.
Examples: reading photos for common precious-stone confusions
Example 1 — Blue stones: A bright, near-opaque navy with a soft, chalky luster is more likely sodalite or lapis than sapphire. In contrast, a transparent deep blue with strong facet reflections and tiny rutile silk inclusions suggests corundum (sapphire). If the image shows banded color or a vitreous but bubble-filled interior, suspect glass.
Example 2 — Green stones: A green with vivid, uneven saturation and visible three-phase inclusions (liquid+gas+solid) can indicate emerald. Hyacinth green with cloudy patches and no distinctive inclusions might be green quartz or glass. A uniform, highly saturated green with curved growth lines in close-ups points to some synthetics.
Example 3 — Red stones: Distinguishing ruby from red spinel or garnet often hinges on refractive behavior and inclusions. Garnets tend to show high clarity with crystal inclusions; spinel can be very clean and vibrant; rubies may have silk-like rutile. Photos that capture internal silk or rutile needles at high magnification strongly sway the ID toward natural corundum.
Example 4 — Diamonds vs. simulants: Diamonds show a particular combination of brilliance (white light return) and dispersion (colored fire). Many simulants show excessive rainbow flashes or dull, soapy reflections. Photos under both diffuse and direct light that show facet contrast and fire help separate diamonds from cubic zirconia and glass, but lab tests are the final arbiter for high-value items.
- Use a loupe photo to highlight inclusion types — that detail often decides between natural and simulant.
- Context matters: a high-value stone in an inexpensive setting lowers the prior probability of being a genuine precious gem.
- When images disagree (one shows bubbly interior, another shows silk), ask for new photos or an in-person check before deciding.
Limitations
Photos are a strong first filter but an imperfect final judge. Three main limitation categories are: visual ambiguity (different materials look similar), hidden treatments (heating, fracture filling), and measurement-dependent properties (refractive index, specific gravity). If any of these are central to your decision, plan for in-person verification.
High-stakes situations — sale of expensive stones, insurance claims, legal disputes — require objective testing: refractometer readings, spectroscopy, and certificates from recognized labs. These tests measure properties that images cannot capture, and they are the industry standard for proving authenticity and origin.
For lower stakes (curiosity, casual collecting), a confident photo-based ID may be sufficient. In that case, clearly label your conclusion as a visual identification and note the remaining uncertainties. This transparency avoids overclaiming and helps future buyers or appraisers understand the provenance of your assessment.
Practical next steps when photos are inconclusive: request more photographs under varied lighting, ask for magnified images of inclusions, seek an on-site inspection by a local jeweler, or pursue laboratory analysis if value or risk justifies the cost.
- High confidence from photos: clear, diagnostic inclusions; distinctive pleochroism; or unmistakable facet and reflection patterns.
- Partial confidence: multiple supportive clues but some conflicting details — pursue a quick hands-on check.
- Low confidence: flat, uniform color; lack of visible inclusions; or evidence of assembly — consider lab testing before acting.
Related guides
Next step: use a quick app review after your photo checks
After you’ve photographed the stone and followed the checklist above, consider using Stone Identifier - Gemalyze as a fast second look. The app helps prioritize likely matches from photos and suggests which hands-on tests would reduce uncertainty. Treat the app as an efficiency tool for triage — useful for saving time and deciding whether to pursue a local jeweler or a lab certificate — not as a substitute for laboratory verification when stakes are high. Learn more at https://stoneidentification.app/ and explore the Gemstone Identification visual guide or the Crystal Identifier by Photo tool for side-by-side examples.
Take the next step →Frequently asked questions
Can I identify a precious stone from a single phone photo?
A single phone photo can provide useful hints but is rarely definitive. Good photos can show color, surface condition, and sometimes inclusions — enough to form a likely identification or rule out common simulants. For more reliable results, provide multiple views (table, profile, back), a scale reference, and close-ups of internal features. If the stone’s value or authenticity matters, follow up with hands-on tests or lab analysis.
What visual inclusion types point to natural stones versus glass or synthetics?
Natural stones commonly show mineral crystals, needle-like rutile (silk), two-phase or three-phase inclusions, and irregular fractures. Glass and many early synthetics often have rounded gas bubbles, swirl marks, or curved growth patterns. Modern synthetics can mimic natural inclusions, so inclusion type increases confidence but does not guarantee natural origin without additional testing.
How should I photograph a stone to make identification easier?
Photograph the stone in diffused daylight plus one image with directional light to reveal sparkle. Capture the face (table), profile, back, and any inclusion close-ups with a magnifier or macro setting. Include a scale reference like a ruler or coin, and note camera type and lighting. Clear, consistent images make visual comparison and expert review far more accurate.
When is a lab certificate necessary to prove a stone’s identity?
Obtain a lab certificate when the stone’s value, provenance, or legal standing affects a transaction — for example, resale above a few thousand dollars, insurance claims, or estate appraisal. Certificates from recognized gemological laboratories provide objective measurements (refractive index, spectroscopy, treatments) and are accepted as proof by buyers, insurers, and courts. For low-value or personal pieces, a local jeweler’s inspection may be a cost-effective intermediate step.