
Red Gemstones: Ruby, Garnet, Spinel, and Lookalikes
Learn how to evaluate red gemstones using visible clues, comparison steps, and safe next checks so you can tell ruby, garnet, spinel, and lookalikes apart.
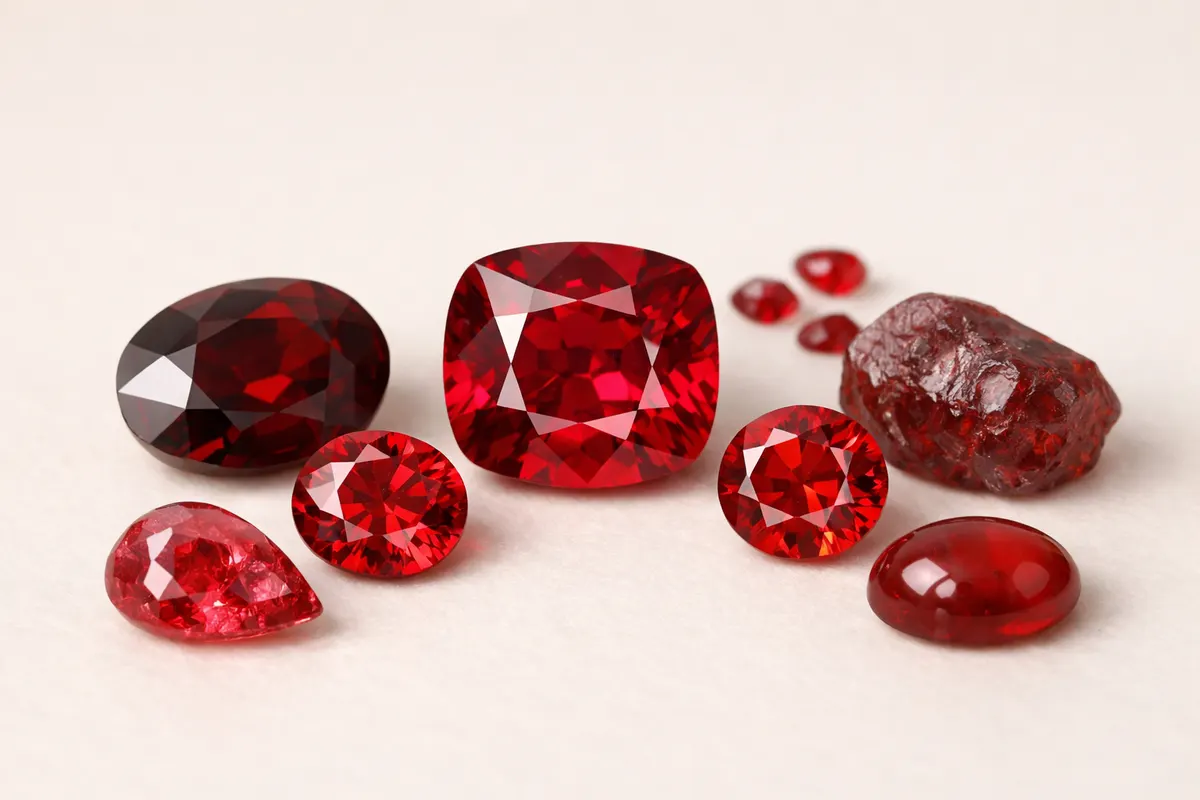
Quick answer: what visible clues tell you about red gemstones
When you look at red gemstones in photos, the strongest, repeatable clues are hue (true red vs. orange-red or purplish-red), transparency and brightness, and characteristic inclusions or growth patterns. Those details help you separate common groups: corundum (ruby) often shows purplish undertones and silk-like rutile needles; pyrope and almandine garnets tend toward deeper, brownish or wine-red tones and strong, single-color appearances; spinel usually reads as bright, pure red with neutral undertones and fewer obvious needles.
No single photograph or clue proves identity. A phone picture can show hue and surface condition reliably when lighting is even, but it will not prove species, treatment, or value. Treat photo-based ID as a likelihood scale—useful for narrowing possibilities, not for final certification. Keep expectations realistic: clues like fluorescence under UV or how heavy the stone feels in the hand are helpful next checks, but laboratory tests are the only way to be certain.
If you’re trying to decide between ruby, garnet, and spinel from a photo, start by comparing hue (is it more orange, purple, or pure red?), looking for visible inclusions (needles, crystals, or gas bubbles), and checking the gem’s reaction to different light angles. Those three visible checks will get you to a short list in most consumer photos without overclaiming identification.
- Hue matters: purplish-red often suggests corundum (ruby or ruby-like); orange-red leans toward pyrope or spessartine garnet; true vivid red is common in spinel.
- Internal textures: silk (rutile needles) and crystal inclusions point to natural corundum; glass-like bubbles and swirl marks point to glass or some synthetics.
- Transparency and brilliance: rubies and spinels often show lively facet reflections; many garnets are deeper and less brilliant despite being transparent.
- Photo-limit rule: don’t convert one strong photo clue into a definitive ID—use it to form a hypothesis and run other simple checks.
Strongest, repeatable clues for red gemstones
Some features survive variations in lighting, camera, and angle better than others. Start with hue and tone: photograph the stone in daylight or under neutral LED light and compare whether the red leans toward orange, pink/purple, or a neutral true red. Hue is often the most reliable single visual clue because it reflects chemistry: chromium-rich corundum tends to lean slightly purple, while pyrope garnet commonly leans slightly brownish or orange.
Clarity and inclusion type are next in diagnostic value. Under a 10x loupe or a close phone macro, look for needle-like 'silk' (thin rutile needles crossing each other), small mineral crystal inclusions, or reflective pinpoint crystals. Silk is classic for many natural rubies and can produce a satiny sheen in cabochons. Garnets often show characteristic irregular crystals or granular textures rather than long needles. Glass imitations frequently show round gas bubbles and curved flow lines visible at modest magnification.
Surface behavior—facet sharpness, polish quality, and wear—helps too. Natural stones cut to standard gem proportions reflect light differently than cast glass or low-grade synthetics. Spinel and high-quality ruby typically show clean, crisp facet junctions with lively reflections. If a red gem looks unusually soft or the facet junctions are rounded and hazy, that’s more consistent with glass or heavily treated material.
Optical effects offer extra confirmation when visible: strong fluorescence to shortwave UV that glows red often points to chromium-bearing corundum (ruby), while most garnets do not fluoresce strongly. Pleochroism or color change—if you can see the color shift when rotating the gem under directional light—also helps: corundum is dichroic (two-color directions) while most spinel and many garnets are singly refractive and show little pleochroism.
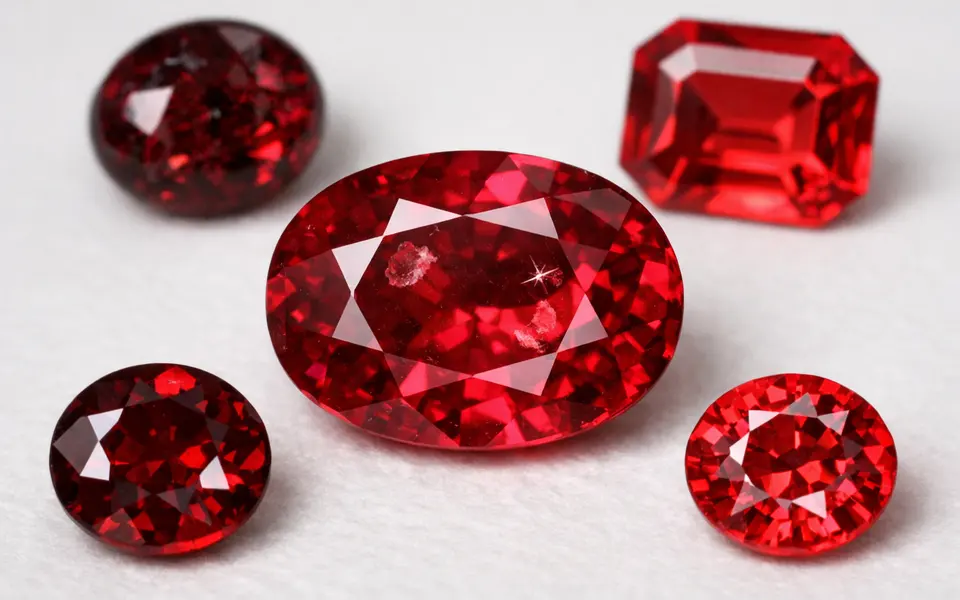
- Hue and tone: orange vs purple vs neutral red narrows the group quickly.
- Inclusions: silk (rutile needles) suggests ruby; round bubbles or curved lines suggest glass.
- Surface: crisp facet junctions and bright reflections favor natural gem materials over glass.
- Fluorescence: red fluorescence under shortwave UV supports corundum but is not definitive.
- Pleochroism: visible color shift under rotation favors corundum (ruby) over spinel.
Weak signals
Color alone is a weak signal for red gemstones. Many different species and manmade materials can produce vivid red tones, and camera white balance, phone filters, and background color dramatically change perceived red. Descriptions like 'pigeon blood' or 'deep ruby red' are subjective and should not be treated as diagnostic evidence without supporting clues.
Brightness or sparkle can mislead when photos use flash. A single flash photo can make a dark garnet appear lively or a dark ruby appear brighter than it really is. Similarly, glare and surface reflections hide internal features and can mask both natural inclusion patterns and synthetic telltales like curved growth lines. If a single photo is all you have, request an additional image in diffuse daylight, a view through the crown, and one of the pavilion to reveal internal structure.
One-angle close-ups and background context are also weak on their own. A cabochon photographed from the top may hide internal needle structures or crystal edges. Weight and heft (specific gravity) and response to a magnet are low-tech but valuable checks that require handling the stone; they can correct misimpressions from photos but can’t be done remotely.
Marketing labels are a red flag for weak signals. Terms such as 'ruby-like' or 'red spinel' used without additional detail are often marketing shorthand. Always ask the seller for more photos, a loupe-view image, and details about any heat-treatment or lab reports before accepting claims that a red stone is a particular species.
- Don’t rely on a single photo’s color—lighting skews hue and saturation.
- Flash can create misleading sparkle and hide inclusions.
- Top-only images hide pavilion clues and doubling effects—ask for multiple angles.
- Seller labels and marketing claims are not diagnostic; demand photos or reports that show internal structure or testing.
A step-by-step comparison workflow for red gemstones
Use clues together, not in isolation. Start by capturing consistent reference photos: a straight-on table view in diffuse daylight, a side/pavilion view, and a macro loupe view. Include a neutral gray card or a white paper swatch in one shot to help judge color later. With those images in hand, list three initial hypotheses—commonly ruby, garnet, or spinel—and then test each hypothesis against the strongest clues you can see.
Hypothesis testing example: if you suspect ruby, look for purplish undertones, rutile silk, and red fluorescence under shortwave UV if available. If you suspect garnet, expect a deeper, more brownish red, fewer needles, and little fluorescence. If you suspect spinel, expect a clean, pure red, fewer inclusions, and no strong pleochroism. For each hypothesis, note which clues match and which contradict; prefer the hypothesis that fits the most reliable clues.
Add quick hands-on checks when possible. Try a heft test (how heavy the stone feels for its size) to sense specific gravity differences: garnet is typically heavier than spinel and corundum per the same dimensions. A small magnet test can reveal magnetic components in certain garnet subtypes (like some pyrope-almandine mixes) but will not detect most corundum or spinel. Use these physical checks as tie-breakers, not as sole proof.
Record uncertainty. If visible clues leave more than one plausible species, mark the result as 'likely' rather than 'definitive' and use the app or lab testing as the next step. A short written checklist with images—hue, inclusions, fluorescence, heft—reduces bias and makes later verification simpler.
- Capture three photos: table, side (pavilion), and macro loupe image with neutral background.
- Form three hypotheses and compare which visible clues support or contradict each.
- Use quick handle tests (heft, magnet) as tie-breakers but not as final proof.
- Label results as 'likely' or 'uncertain' and keep images and notes for follow-up.
App workflow
After you’ve gathered the photos and run the visual checklist above, use a smartphone identification app as a structured first-pass. An app can compare your photos to many reference images, highlight likely matches, and point out suspicious visual cues like glassy bubbles or very regular curved growth lines. Treat the app’s results as research notes—helpful for narrowing possibilities, not as a certificate of identity.
Stone Identifier - Gemalyze works best when you feed it the same careful photos and checklist you created: neutral lighting table view, side view, and a loupe macro. The app’s match suggestions should be read alongside your own notes (hue, inclusions, fluorescence, heft). If the app suggests multiple close matches, use the hands-on tests described above or consult a gemologist for lab-grade testing.
If you remain uncertain after app analysis and hands-on checks, consider next steps: request a gemological report for high-value items, ask the seller for treatment disclosure and clearer loupe images, or compare specimens side-by-side with known samples. For many everyday pieces—costume jewelry or inexpensive garnets—careful visual checks plus an app’s suggestions are enough to be confident about likely identity.
For readers who want deeper guidance on photo-based pitfalls and safer verification steps, our related primer Real vs Fake Gemstones: Photo Clues, Limits, and Safer Next Steps explains how to escalate uncertainty and when to seek lab tests. Use digital tools to narrow possibilities, then treat uncertain results as prompts for further investigation rather than final answers.
- Upload (scan) photos into the app after taking neutral-light table, side, and loupe images.
- Compare the app’s suggested matches to your own checklist and prioritize tests that resolve disagreements.
- For high-value items or persistent uncertainty, get a gemological report rather than relying solely on app output.
- Use app results as research notes—document suggestions and next checks for follow-up.
Related guides
Try Stone Identifier - Gemalyze after your visual checklist
Use Stone Identifier - Gemalyze as a structured first pass after you’ve checked hue, inclusions, and fluorescence. Scan your neutral-light table, side, and loupe photos into the app to get likely matches and research notes, then treat suggestions as hypotheses to confirm with hands-on tests or lab reports when value or certainty matters. The app helps prioritize next checks—use its output, keep your uncertainty notes, and seek professional testing for high-value pieces.
Take the next step →Frequently asked questions
Can I tell if a red gemstone is a ruby from a single phone photo?
No—one phone photo rarely proves a ruby. A single image can show hue and surface condition, which help form a hypothesis, but ruby (corundum) must be differentiated from spinel, garnet, and glass through multiple clues: visible inclusions (rutile silk), purplish undertone, pleochroism under directional light, fluorescence under UV, and ideally professional testing. Use one photo to narrow choices, then gather side and macro images and run simple hands-on checks or lab tests for confirmation.
What inclusion features reliably separate natural red stones from glass or synthetic imitations?
Natural stones often show mineral inclusions: needle-like rutile (silk) in corundum, small crystal inclusions or granular textures in garnets, and angular mineral crystals in many natural specimens. Glass and some synthetics commonly show round gas bubbles, curved flow lines, and strain patterns that look too regular for natural mineral growth. Look under 10x magnification or a strong phone macro: round bubbles and curved lines are strong visual cues of non-natural material, but absence of these doesn't prove natural origin.
How helpful is UV fluorescence when checking red gemstones?
UV fluorescence is a useful supporting clue. Many natural rubies fluoresce red under shortwave UV due to chromium, which can make them appear brighter in photos taken with UV light. Most garnets do not fluoresce strongly, and spinel rarely shows intense red fluorescence. However, fluorescence varies by locality and treatment and is not conclusive by itself. Use it alongside hue, inclusions, and heft to build a consistent identification picture.
When should I send a red gemstone for laboratory testing?
Send a stone for professional gemological testing when the item is high-value, historically significant, or when ID uncertainty affects purchase or insurance decisions. If visual clues conflict—for example, a vivid true red color but no expected corundum inclusions—or if treatments and origin matter to you, a lab report will provide definitive species, treatments, and sometimes origin information. For lower-value, everyday jewelry, careful visual checks plus an app’s structured suggestions are often sufficient.